
Side Dishes
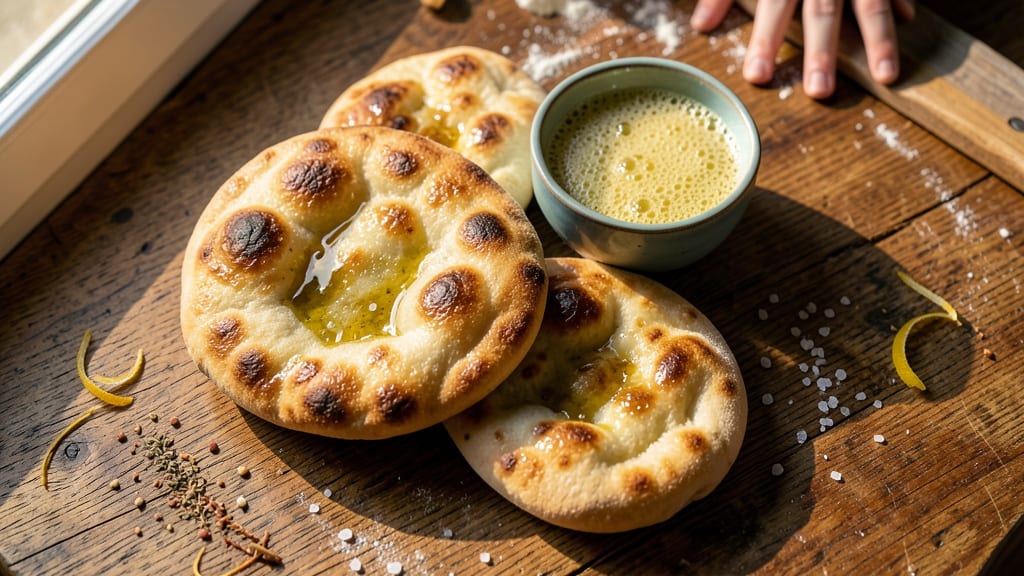
This Armenian pita bread recipe delivers the perfect balance of crispy za'atar-kissed crust and pillowy softness inside—just like the bread you'd find at a bustling Armenian meze table.
The secret lies in a simple dough that transforms with the right stretching technique and foil-sealing method, creating a bread so tender it practically melts in your mouth while maintaining that satisfying crunch. I've tested countless variations, and this version consistently delivers restaurant-quality results at home.
The process begins with a straightforward dough made from basic pantry staples, but it's the shaping and baking technique that truly elevates it. You'll learn how to stretch the dough by hand for that signature thinness or use a rolling pin for more control—both methods work beautifully.
The za'atar seasoning isn't just for flavor; it creates that signature golden crust that's both aromatic and irresistibly crispy. This bread isn't just about the technique though—it's about the experience of pulling apart warm, foil-sealed pita that's still steaming when you serve it.
What makes this recipe truly special is its versatility. Use it as a wrap for grilled meats and fresh vegetables, serve it alongside soups to soak up every last drop, or enjoy it plain with a generous sprinkle of za'atar and olive oil.
The foil-sealing method keeps the bread soft for hours, making it perfect for meal prep or serving a crowd. Each bite delivers that perfect contrast of textures—crispy edges giving way to soft, airy centers—with just a hint of earthy za'atar flavor that ties everything together.
Whether you're preparing for a traditional Armenian feast or simply craving authentic flavors, this pita bread recipe will become a staple in your kitchen. The method is straightforward enough for beginners but delivers professional results, and the possibilities for serving are endless.
Let's get started on creating bread that will have everyone asking for seconds.
Ingredients for armenian pita bread
Eight simple ingredients transform into restaurant-quality Armenian pita with that signature crispy crust and soft center.
| Ingredient | Amount | Notes |
|---|---|---|
| All-Purpose Flour 🌾 | 4 cups | Spooned and leveled for accuracy |
| Active Dry Yeast 🍞 | ¼ oz | Or 2 1/4 tsp packet |
| Granulated Sugar 🍚 | 1 tbsp | Feeds the yeast quickly |
| Salt 🧂 | 1 tsp | Diamond Crystal preferred |
| Warm Water 💧 | 1 ¼ cups | 110°F for ideal yeast activation |
| Extra-Virgin Olive Oil 🫒 | ¼ cup | For dough elasticity |
| Za'atar Seasoning 🌿 | 2 tbsp | Homemade or store-bought |
| Semolina Flour 🌾 | ½ cup | For dusting and crust |
| Cornmeal 🌽 | ¼ cup | For baking surface |
The za'atar seasoning is where the magic happens—look for blends with sesame seeds and sumac at Middle Eastern markets or specialty stores like Whole Foods. If you can't find it, DIY by mixing 1 tbsp sesame seeds, 1 tsp sumac, 1 tsp dried thyme, and 1/2 tsp salt. The yeast needs to be fresh, so check the expiration date on the packet. For the olive oil, California avocado oil works perfectly if you prefer a neutral flavor. The dough's texture depends on accurate measurements—spoon the flour into your measuring cup and level it off for consistency.
No za'atar? Mix 1 tbsp sesame seeds, 1 tsp dried thyme, 1/2 tsp salt, and a pinch of sumac—it won't be identical but gets you close. Running short on semolina? Use all-purpose flour instead, though the crust won't be quite as crispy. The water temperature matters—too hot kills the yeast, too cold slows activation. If your kitchen is cold, warm the water to 110°F (like baby bath temperature). For extra flavor, add 1 tsp garlic powder to the dough. The cornmeal can be swapped for rice flour if you're sensitive to gluten.
Dough keeps for 3 days wrapped in plastic in the fridge or 3 months frozen. For best results, let it rise at room temperature—70-75°F is ideal. If your kitchen is cold, place the bowl near a warm spot like the oven with the light on. The foil-sealed pita stays soft for 2 days at room temperature, making it perfect for meal prep. Store leftovers in an airtight container to maintain freshness.
Why You'll Love This Recipe
- Pantry Staples Only: I swear by this recipe because it uses exactly what I always have: flour, yeast, sugar, and water. No specialty ingredients, no last-minute grocery runs—just mix, rest, and bake. Honestly, the simplicity is what keeps me coming back.
- That Perfect Pull: The moment you stretch the dough and watch it puff into a golden, blistered pocket? Pure magic. The sugar in the dough caramelizes just enough to give it a subtle sweetness, while the yeast keeps it light—like a warm hug in bread form.
- Weeknight Wrap Hero: Forget buying store-bought pita—this dough stretches so easily, and it’s perfect for everything from falafel bowls to grilled cheese. I make a double batch on Sundays and freeze half; by Wednesday, it’s my secret weapon for lazy dinners.
- Budget-Friendly Baking: A single batch costs pennies and feeds four. The dough rises while you do other things, and the leftovers toast up beautifully the next day. Between us, this is the kind of recipe that makes me feel like I’m feeding a crowd without breaking the bank.
Step-by-step instructions for Armenian pita bread
Here's how to craft pillowy pita with a fragrant za'atar crust and sealed-in softness.
Activate the Yeast for Maximum Rise
In a small bowl, whisk together the 1.25 cups warm water (about 110°F—test by touching your wrist; it should feel warm but not hot) with the 1 tbsp granulated sugar and 0.25 oz active dry yeast. Let it sit for 5-10 minutes until it becomes frothy and bubbly. This tells you the yeast is alive and ready to work its magic.
If it doesn't bubble after 10 minutes, your yeast might be dead—start fresh with a new packet. Once it's active, add the 1 tsp salt and stir. The salt will help control the yeast's growth and add flavor to the dough.
Mix and Knead the Dough
In a large mixing bowl, combine the 4 cups all-purpose flour and the yeast mixture. Using a wooden spoon, stir until a shaggy dough forms. Then add the 0.25 cup extra-virgin olive oil and mix again until everything comes together.
Turn the dough onto a lightly floured surface and knead for 8-10 minutes until smooth and elastic. You'll know it's ready when it springs back slowly when poked. If it feels sticky, add a little more flour—just enough to make it workable. This kneading develops gluten, which gives the pita its signature softness.
First Rise and Flavor Infusion
Place the dough back in the bowl, cover it with a clean kitchen towel, and let it rise in a warm spot for 1-1.5 hours, or until it has nearly doubled in size. The kitchen should feel warm—near an oven with the light on works great if your home is chilly.
Once it's puffy, punch it down to release the air and divide it into 8 equal pieces. Roll each piece into a ball, then flatten into a 6-inch circle. Brush the tops generously with olive oil and sprinkle with 2 tbsp za'atar seasoning, pressing it gently into the dough. The za'atar will give your pita that irresistible nutty, herby aroma and flavor.
Seal and Bake for Perfect Texture
Preheat your oven to 450°F and line a baking sheet with parchment paper. Sprinkle the 0.25 cup cornmeal evenly over the paper—this prevents sticking and adds a subtle crunch. Arrange the pita circles on the sheet, leaving 1 inch between each.
Here's the trick: wrap each pita tightly in a 12x12-inch square of aluminum foil, sealing the edges completely. This creates steam inside, which keeps the bread soft and pillowy. Bake for 12-15 minutes until the pita is golden brown and sounds hollow when tapped.
Dust and Serve Warm
Remove the pita from the oven and carefully unwrap them. Immediately brush the tops with a little more olive oil and sprinkle with 0.5 cup semolina flour. This adds texture and prevents sticking. Let them cool for 2-3 minutes before serving.
Serve warm with your favorite fillings—hummus, grilled meats, or fresh vegetables. The foil-sealed method ensures every bite is soft and flavorful, with that perfect za'atar-kissed crust. Store any leftovers in an airtight container for up to 3 days, but they'll disappear long before that!
Pro Tips For Making Armenian Pita Bread
- Use a Thermometer for Water: Armenian pita dough needs yeast to activate at a steady 105–110°F—any hotter and you kill it. I learned this the hard way when my dough failed because I eyeballed "warm water." Pop a cheap thermometer in the water first, then mix. No second-guessing.
- Knead Until Silky: This dough should stretch like taffy, not fight you. After 8–10 minutes of kneading, grab a small piece—if it springs back slowly and doesn’t tear, you’re good. Over-kneading? The dough toughens; under-kneaded? Your pita will crack like a biscuit. (Yes, even if you’re impatient like me.)
- Let Dough Rise Twice: First rise (1–2 hours) builds flavor, but the second rise (30–45 minutes) is what makes the bread tender. Skip the second rise, and your pita will be dense. Pro tip: Cover loosely with a towel—plastic traps moisture and slows things down.
- Roll Out Thin, Cook Fast: Armenian pita needs to be rolled to ⅛-inch thickness or thinner—any thicker, and the center stays doughy. Heat your skillet ripping hot (medium-high is too gentle), then cook each pita for 30–45 seconds per side until blistered. (Your future self will thank you for not rushing this.)
Essential equipment for great armenian pita bread
Must-Have Tools
You don’t need a professional bakery setup—just a few essential tools. A large mixing bowl (I use my 5-quart stainless steel bowl) is perfect for combining ingredients. For kneading, I recommend a wooden dough scraper (like the OXO Good Grips) to help with cleanup and shaping.
A digital kitchen scale (I love the Escali Primo) ensures precise measurements, especially for yeast and salt. 🔥
Foil-Sealing Kit
The secret to that signature softness is the foil-sealing technique. Grab a 12x12-inch roll of heavy-duty aluminum foil (Reynolds is my go-to). You’ll also need parchment paper (I prefer Gourmet Gourmet brand) to line your baking sheet—it prevents sticking and makes cleanup a breeze.
A pizza stone (like the Lodge Prep & Serve) is optional but helps create a crispier crust if you prefer it.
Rolling Pin vs. Hand-Stretching
For traditional Armenian pita, many cooks prefer hand-stretching the dough for that signature thinness. However, a French-style rolling pin (I use the Nordic Ware) works beautifully if you’re more comfortable with that method.
If you’re stretching by hand, lightly flour your workspace and use your fingers to gently press the dough outward. The key is patience—don’t force it, or the dough will tear. ✨
Za'atar Application Tools
To evenly distribute the za'atar seasoning, I recommend a fine-mesh strainer (like the OXO Good Grips) or a small paintbrush for a delicate touch. A pastry brush (I keep one from West Bend) also works well for brushing olive oil onto the dough before baking.
These tools ensure every bite gets that fragrant, herby flavor without clumping.
Baking Essentials
Your oven is the star of the show, so make sure it’s preheated to 450°F for the best results. A thermometer (I use the Thermoworks Oven Thermometer) helps maintain accuracy, especially if your oven runs hot or cold.
For dusting after baking, a small sieve (like the Norpro Stainless Steel) makes it easy to sprinkle semolina flour evenly over the pita. This adds texture and prevents sticking when serving.
Storage Solutions
To keep your pita fresh, invest in airtight containers (I love the Rubbermaid Brilliance line) for leftovers. If you’re freezing dough, use quart-sized freezer bags (like Ziploc) to save space.
For serving, a wooden serving board (I use a Williams Sonoma brand) adds a rustic touch and keeps pita warm while you’re plating. 💫
Nutrition facts
Frequently asked questions
Why does Armenian pita need foil sealing during baking?
The foil-sealing method creates steam inside, which keeps the bread incredibly soft and pillowy while baking. This traditional technique prevents the pita from drying out, giving you that restaurant-quality texture where the crust is crispy but the inside melts in your mouth. Without it, you'll get a more typical flatbread texture rather than the signature Armenian softness.
Can I make this pita without za'atar seasoning?
If you can't find za'atar, create a simple substitute by mixing 1 tbsp sesame seeds, 1/2 tsp dried thyme, 1/2 tsp salt, and a pinch of sumac. While it won't be identical, it will still give your pita a nutty, herby flavor. For a completely neutral version, just skip the seasoning and focus on the olive oil for flavor.
How do I know when the dough is properly kneaded?
Your dough is ready when it's smooth and elastic, and it springs back slowly when you poke it gently with your finger. For visual confirmation, it should feel like soft modeling clay rather than sticky or crumbly. If it feels too sticky, add just a little more flour—about 1 tablespoon at a time—while kneading. Over-kneading can make the dough tough, so aim for 8-10 minutes total.
What's the best way to reheat leftover Armenian pita?
For maximum softness, wrap the pita in a damp paper towel and warm it in the microwave for 10-15 seconds. Alternatively, heat it in a dry skillet over medium heat for about 1 minute per side until warmed through. The foil-sealing method keeps pita fresh for 2 days at room temperature, but reheating helps restore that just-baked texture.
Can I make this pita in a Dutch oven for extra crispiness?
Yes! For a crispier crust, bake the foil-sealed pita in a preheated Dutch oven at 450°F for 10-12 minutes. Remove the foil after 5 minutes to allow the top to brown. The Dutch oven's heavy metal will create a more pronounced crust while keeping the inside soft. Just be sure to place the pita directly on the oven rack or a heatproof mat to prevent sticking.