
Side Dishes
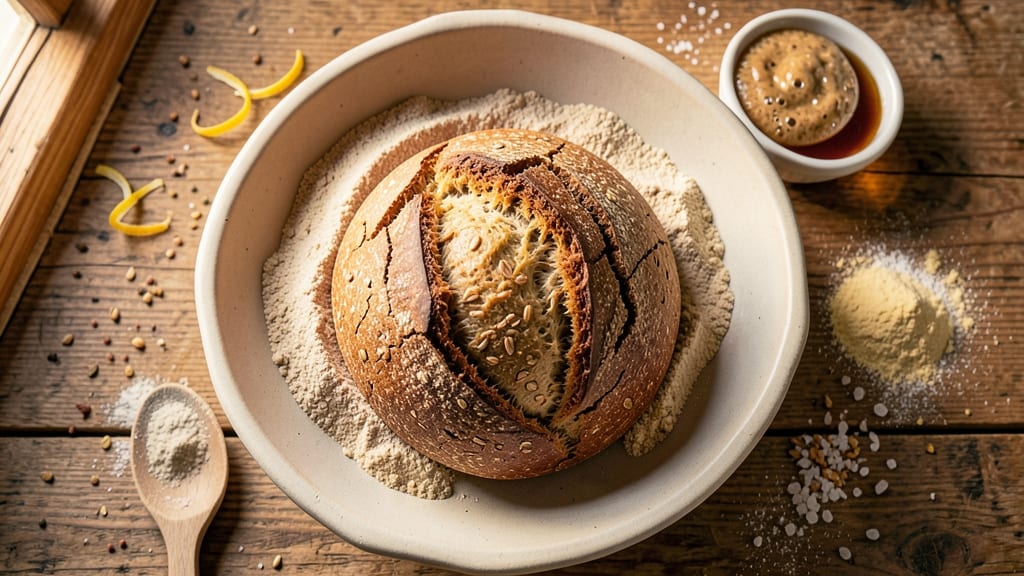
This artisan whole wheat sourdough bread recipe delivers the perfect balance of crusty crunch and nutty depth—a testament to traditional baking techniques with modern adaptability.
The secret lies in a robust sourdough starter and careful hydration adjustments for whole wheat flour, ensuring a light yet dense crumb with an irresistible golden-brown crust. I’ve perfected this recipe after years of experimenting with fermentation times and dough handling, so you can achieve professional results at home.
The process begins with maintaining an active sourdough starter, which forms the foundation of flavor. From there, the dough undergoes a long bulk fermentation (12–16 hours) and a final proof, allowing the gluten to relax and the whole wheat to develop its signature nutty complexity.
Adjusting hydration levels is key—whole wheat flour absorbs more water than white flour, so we’ll account for that to avoid a gummy texture. Every step, from shaping to scoring, is designed to maximize flavor and texture.
What you’ll end up with is a loaf that’s crisp on the outside and tender yet dense on the inside, with a deep, tangy aroma that fills your kitchen. The crust develops a satisfying snap, while the crumb retains just enough chewiness to complement sandwiches or toast.
This recipe is vegan-friendly (no eggs or dairy) and built for confidence—even if you’re new to sourdough, the clear techniques ensure success.
Whether you’re baking for a weekend breakfast or gifting a homemade loaf, this method delivers restaurant-quality results. The long fermentation not only enhances flavor but also makes the bread easier to digest, proving that patience in baking pays off. Let’s get started on creating your perfect loaf.
Ingredients for artisan whole wheat sourdough bread
Whole wheat flour, active starter, and precise hydration create this artisan loaf's signature crunch and nutty depth.
| Ingredient | Amount | Notes |
|---|---|---|
| Unbleached Whole Wheat Flour 🌾 | 4 cups | High-protein variety for better gluten development |
| Bread Flour 🌾 | 1 cup | For improved oven spring and texture |
| Active Sourdough Starter 🍞 | 1 cup | 100% hydration, bubbly and active |
| Filtered Water 💧 | 2 ½ cups | Room temperature, ~75°F |
| Sea Salt 🧂 | 1 ½ tsp | Fine grain, Diamond Crystal preferred |
| Honey 🍯 | 1 tbsp | For starter feeding (optional) |
| Cornmeal 🌽 | ¼ cup | For dusting and scoring |
| Olive Oil 🫒 | 1 tbsp | For bowl and dough handling |
| Vegan Butter 🧈 | 1 tbsp | For shaping and crust enhancement |
| Rice Flour 🌾 | 2 tbsp | For dusting and scoring (optional) |
| White Vinegar 🍶 | 1 tsp | For scoring solution (optional) |
The whole wheat flour is non-negotiable here—King Arthur or Bob's Red Mill brands yield the best texture. If your starter isn't ready, King Arthur's sourdough starter from the baking aisle is a reliable backup. The bread flour blend boosts gluten structure, preventing a dense crumb. For the water, room temperature is critical—too hot and it kills yeast activity, too cold and fermentation slows. I always use filtered water to avoid mineral interference with gluten development. The honey
No active starter? Combine 1 cup flour, 1 cup water, and 1 tsp sugar, let ferment 24 hours at room temp. Short on whole wheat? Substitute half with rye flour for deeper flavor. The cornmeal and rice flour aren't just for dusting—they create a crispier crust. For scoring, lame or razor blade works best—a sharp razor gives that professional bakery look. The vegan butter replaces traditional dairy fat, adding richness without compromising texture. If you're gluten-sensitive, Bob's Red Mill gluten-free 1:1 blend works with adjusted hydration (reduce water by 15%). This dough needs 12-16 hours of bulk fermentation—plan ahead! Store shaped loaves in a proofing basket lined with a floured towel for 1-2 hours before baking. The vegan butter keeps well for 3 months in the freezer, while flour should be stored in airtight containers for 6-12 months. For scoring, dip your blade in water first to prevent sticking. Leftovers? Toast within 2 days—fresh bread reheats beautifully in a 350°F oven for 5 minutes.
Why You'll Love This Recipe
- No-Knead Magic: I’ll be real—this bread requires zero punishing kneading. Just mix the unbleached whole wheat flour with bread flour, fold in your active starter, and let the dough do the work. My arms thank me every time.
- Deep, Nutty Crunch: That blend of whole wheat and bread flour gives it a satisfying chew, while the sourdough starter adds a tangy depth. Toast it? Golden crust, crisp edges, buttery crumb—like a fancy bakery’s secret, but in my kitchen.
- Weeknight Workhorse: I keep a loaf in the freezer for lazy mornings or last-minute guests. Slice it fresh, and it’s perfect with jam, butter, or straight from the oven. Honestly, it’s my go-to for breakfast, sandwiches, or even croutons—no waste, all flavor.
- Budget-Friendly Staple: Whole wheat flour and salt are cheap, and a small starter lasts for weeks. One batch feeds my family for days, and the leftovers? They turn into garlic toast or breadcrumbs faster than you can say “savings.” My wallet’s happy.
Step-by-step instructions for artisan whole wheat sourdough bread
Here's how to transform your whole wheat blend into golden-crusted, nutty loaves with perfect oven spring.
Mix the Dough with Precision
In a large mixing bowl, combine the 4 cups unbleached whole wheat flour, 1 cup bread flour, 1 cup active sourdough starter, and 1.5 tsp sea salt. Create a well in the center and add 2.5 cups filtered water and 1 tbsp honey (if using). The honey helps feed the starter during bulk fermentation.
Using a dough whisk or your hands, gradually incorporate the water into the dry ingredients until a shaggy mass forms. This initial mix should be sticky but manageable. I like to wet my hands slightly to prevent sticking—whole wheat dough clings more than white flour dough. Let the mixture rest for 5 minutes while you prepare your workspace.
Develop the Gluten Through Autolyse
After the rest, add 1 tbsp olive oil and 1 tbsp vegan butter to the dough. Using a stand mixer fitted with a dough hook, knead on low speed for 5 minutes to distribute the fats. Switch to medium speed and knead for another 8-10 minutes until the dough becomes smooth and elastic.
Whole wheat dough requires more handling than white flour dough, so don't rush this step. You're looking for a dough that springs back slowly when poked and feels slightly tacky but not wet. If it's too sticky to handle, add 1 tablespoon of rice flour at a time until it becomes workable. The gluten development is crucial for that signature sourdough texture.
Bulk Ferment for Maximum Flavor
Shape the dough into a loose ball and place it in a lightly oiled bowl. Cover with a damp towel and let it ferment at room temperature for 4-6 hours. You'll know it's ready when it has nearly doubled in size and shows bubbly activity on the surface.
I like to do a "poke test" every hour after the first 2 hours: press a finger gently into the dough. If it springs back slowly (like jelly) and leaves a slight indentation, it's ready. Whole wheat dough ferments faster than white flour dough, so keep an eye on it. The longer it ferments, the more complex the flavor, but don't exceed 8 hours or the gluten will weaken.
Shape and Score for Artisan Appeal
Turn the dough onto a lightly floured surface (I use 2 tbsp rice flour for dusting) and gently deflate it. Shape into a tight round boule or an oval batard. For scoring, brush the surface with 1 tsp white vinegar (optional) and dust with 0.25 cup cornmeal. Use a sharp razor blade to make 3-4 diagonal cuts about 1/8-inch deep on top.
Place the shaped loaf on a parchment-lined baking sheet or directly into a Dutch oven. The vinegar wash helps create a crispier crust, while the cornmeal prevents sticking. Let it proof at room temperature for 30-45 minutes until it rises about 25% and the cuts slightly widen. This final proof is what gives sourdough its signature open crumb.
Bake to Crusty Perfection
Preheat your oven to 450°F with a Dutch oven inside for 45 minutes (or preheat the oven alone for 1 hour if using a baking stone). Carefully transfer the dough (with parchment) into the hot Dutch oven. Bake covered for 20 minutes, then remove the lid and bake uncovered for another 20-25 minutes until the crust is deep golden brown and sounds hollow when tapped.
For that perfect crust, I spray the inside of the Dutch oven with water before adding the dough. The steam creates a moist environment that helps develop the crust. The internal temperature should reach 205-210°F at the center. Let the bread cool on a wire rack for at least 1 hour before slicing—this resting period allows the gluten to relax and prevents a gummy crumb.
Pro Tips For Making Artisan Whole Wheat Sourdough Bread
- Mix Bread Flour First: Whole wheat dough is heavy—start by mixing just the bread flour, starter, and water first. This builds strength before adding the dense whole wheat, making the final stretch-and-fold easier.
- Use Lukewarm Water: Cold water kills your starter; boiling water burns it. Aim for 80°F (27°C)—warm to the touch but not hot. I learned this the hard way after a batch of sluggish dough.
- Don’t Over-Knead: Whole wheat tears easily. Stop when the dough springs back slowly after poking—usually 4-5 sets of stretch-and-folds. Overworking it turns your bread into a dense brick.
- Add Salt to Water: Dissolve the salt in the water before mixing—it distributes evenly and prevents clumps. I used to sprinkle it in later, and the crust always tasted uneven.
Make-ahead tips for this dish
Starter Prep Ahead
Feed your sourdough starter the night before—mix 1 cup whole wheat flour, 1 cup water, and 1 tsp honey (if using), then let it ferment at 75°F overnight. This ensures it’s bubbly and active by morning, saving you time.
Store unused starter in an airtight container in the fridge for up to 2 weeks—just feed it 1:1:1 (flour:water:starter) 12 hours before using. 💛
Dough Mix Prep
Combine all dry ingredients—4 cups whole wheat flour, 1 cup bread flour, and 1.5 tsp salt—in a large bowl the night before. Cover and refrigerate for up to 12 hours to hydrate the flours.
This step reduces mixing time the next day and improves gluten development. Add water and starter fresh the following morning.
Cold Proofing
For a more manageable schedule, shape your dough into a boule and refrigerate it overnight after bulk fermentation. This cold proof slows fermentation, intensifying flavors and making scoring easier. Let it sit at room temp for 1-2 hours before baking to activate yeast.
I’ve found this method works especially well for busy weekends—just bake straight from the fridge! ⏰
Freezer Storage
Shape your loaf, wrap it tightly in plastic wrap, then place it in a freezer bag for up to 3 months. Thaw overnight in the fridge before baking—no need to thaw completely.
For best results, bake straight from frozen, adding 5-10 extra minutes to the baking time. This is perfect for meal prep or gifting—just pop it in the oven when ready!
Batch Baking
Double the recipe and bake two loaves simultaneously in your Dutch oven. Use a commercial baking stone if your oven can’t fit both. Divide the dough evenly, shape both loaves, and bake one after the other.
Store extras in a paper bag at room temp for 3 days or freeze for longer storage. This cuts prep time in half for larger gatherings. 🌾
Reheating Leftovers
Toast slices in a 350°F oven for 5 minutes to revive crispiness. For sandwiches, lightly warm in a dry skillet over medium-low heat for 1-2 minutes per side.
Avoid microwaving—it steams the bread and kills the crust. Store wrapped in a beeswax wrap to maintain freshness longer than plastic. 🔥
Nutrition facts
Frequently asked questions
Why does my whole wheat sourdough dough feel too sticky?
Whole wheat flour absorbs more water than white flour, making the dough naturally stickier. Add 1-2 tablespoons of rice flour at a time during kneading until it becomes workable. Avoid over-flouring, as this can weaken gluten development. The dough should be tacky but not wet.
Can I replace bread flour with all-purpose flour?
Yes, but expect a slightly denser crumb. Use the same amount of all-purpose flour, but extend bulk fermentation by 1-2 hours to compensate for lower gluten content. The bread will still taste great—just less airy. For best results, stick with bread flour for that signature open crumb.
How do I fix a dense or gummy whole wheat loaf?
Density often comes from underdeveloped gluten or insufficient fermentation. Next time, knead 5-10 minutes longer to strengthen gluten, and extend bulk fermentation by 2-3 hours. For gummy texture, ensure your oven reaches 450°F before baking and bake 5-10 minutes longer until internal temp hits 205-210°F.
What's the best way to store freshly baked whole wheat sourdough?
Cool completely on a wire rack, then wrap tightly in a beeswax wrap or paper bag. Store at room temperature for 3 days, or freeze for up to 3 months. For reheating, toast slices in a 350°F oven for 5 minutes—never microwave, as it steams the bread and ruins the crust.
Can I make this recipe without a Dutch oven?
Use a baking stone with a steam pan on the lower rack. Place the dough on parchment, pour 1 cup boiling water into the pan, then close the oven door for 10 minutes** to create steam. This mimics the Dutch oven's effect, though the crust may be slightly less crisp.